Security is an important aspect of any application, and Spring Security makes it secure by default. In this tutorial, we will discuss how to create multiple Spring Security configurations and why you might want to do so. We'll cover everything from setting up a new project, to customizing security configurations, and exploring multiple security filter chains. So let's dive in!
Creating a New Project
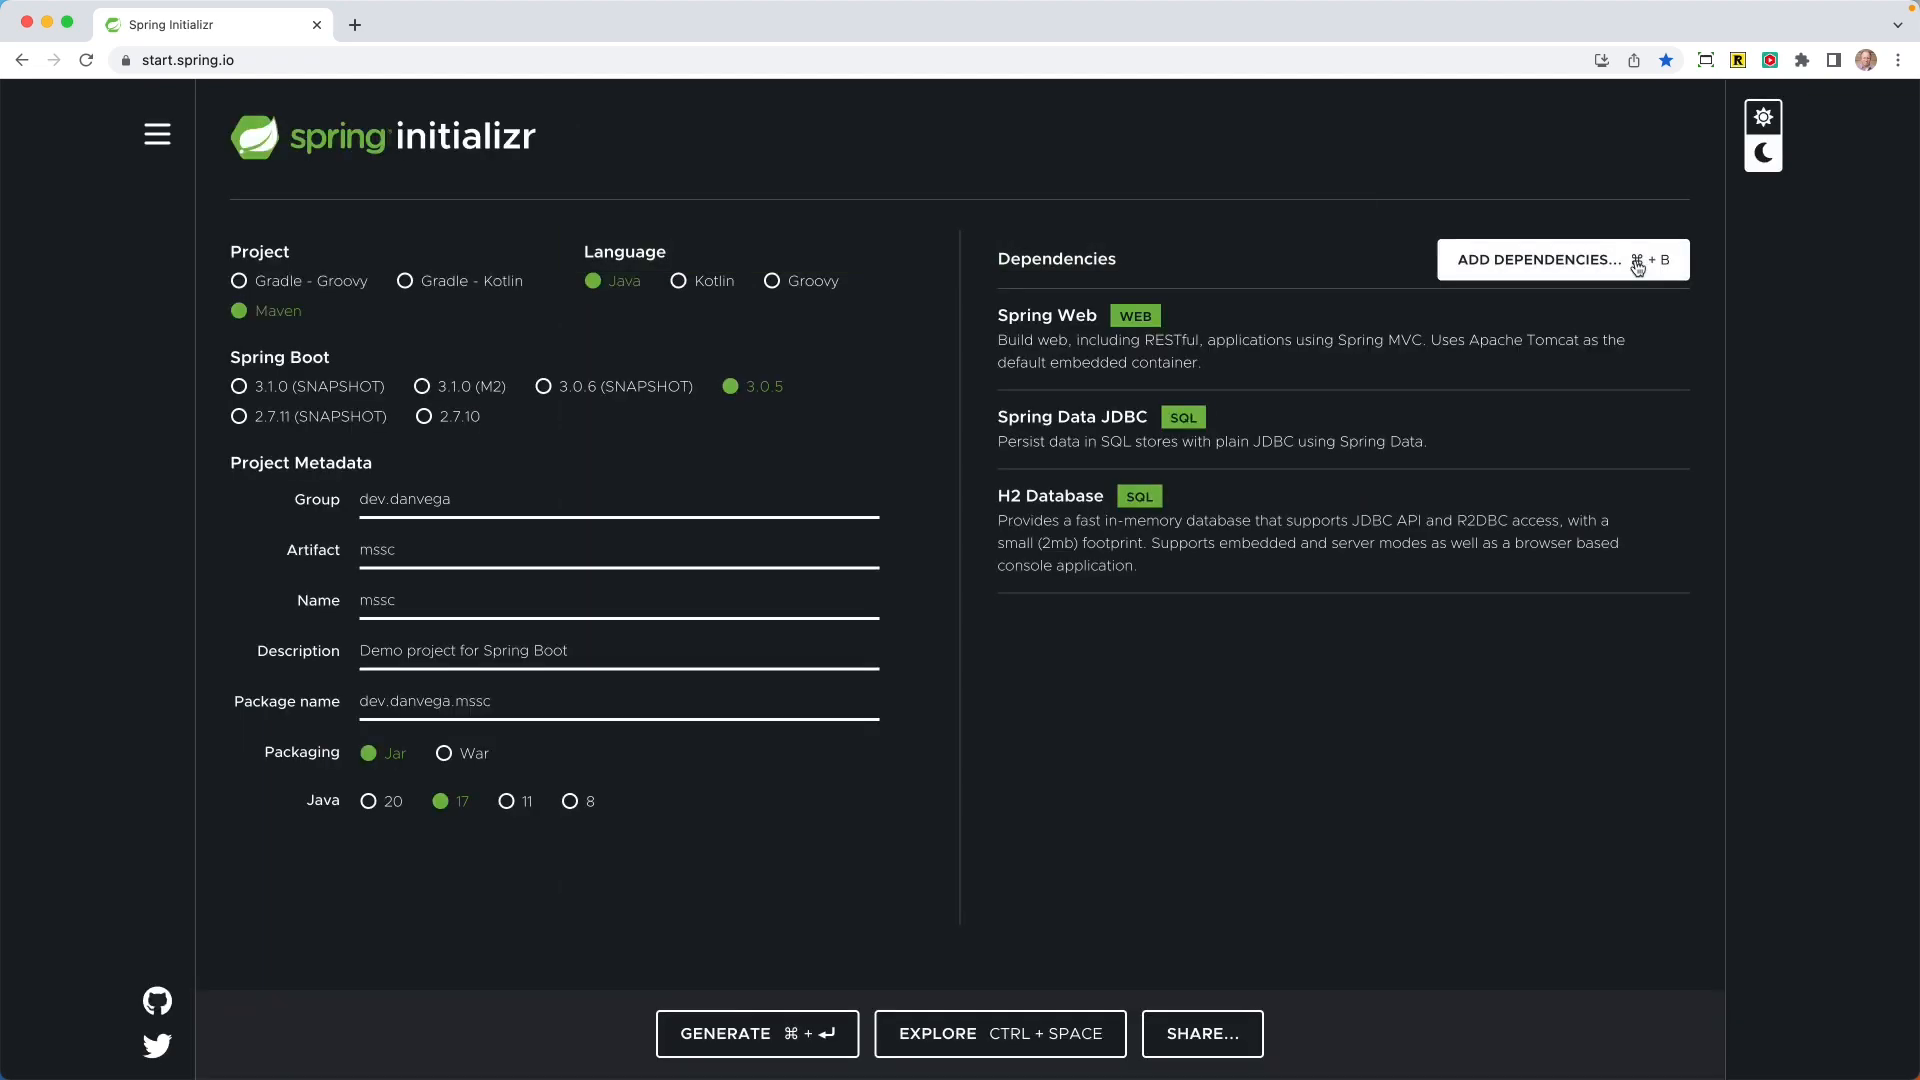
First, head over to start.spring.io and create a new project with the following settings:
- Build Tool: Maven
- Language: Java
- Packaging: Jar
- Java Version: 17
Next, add the following dependencies:
- Web
- Spring Security (leave it off for now, we'll add it later)
- Spring Data JDBC
- H2 Database
 Generate the project and open it up in your favorite IDE.
Setting up the Application
First, create a simple domain model called Post with some fields like id, title, and content. Annotate the id field with @Id:
public record Post(@Id Integer id, String title, String content) {
}
Next, create a PostRepository interface that extends CrudRepository.
public interface PostRepository extends ListCrudRepository<Post,Integer> {
}
Then, create two controllers:
HomeControllerwith two mappings for the root and private URLs, returning strings "hello home" and "secured" respectively.
@RestController
public class HomeController {
@GetMapping("/")
public String home() {
return "Hello, World!";
}
@GetMapping("/private")
public String secure() {
return "secured";
}
}
PostControllerwith a request mapping for/api/postsand a methodfindAllthat returns all the posts using thePostRepository.
@RestController
@RequestMapping("/api/posts")
public class PostController {
private final PostRepository repository;
public PostController(PostRepository repository) {
this.repository = repository;
}
@GetMapping
public List<Post> findAll() {
return repository.findAll();
}
}
After this, create a schema.sql file in the resources folder with SQL to create a posts table and insert a single row. Also, update your application.properties file to set the data source name to "blog" and enable the H2 console.
create table Post (
id int auto_increment primary key ,
title varchar(255) not null,
content text not null
);
INSERT INTO POST(title,content) VALUES ('Hello, World!','My First Blog Post');
spring.datasource.generate-unique-name=false
spring.datasource.name=blog
spring.h2.console.enabled=true
Now, run the application and you should be able to access the H2 console at localhost:8080/h2-console.
Adding Spring Security
Add the Spring Security dependency manually to your project configuration:
<dependency>
<groupId>org.springframework.boot</groupId>
<artifactId>spring-boot-starter-security</artifactId>
</dependency>
Refresh your Maven dependencies, then restart the application. You'll notice you now need to authenticate to access the H2 console (with a randomly generated password and the username "user").
Configuring Spring Security
In this tutorial, we'll create multiple Spring Security configurations for different authorization scenarios:
- Configuration for the H2 console
- Configuration for securing the API with HTTP Basic authentication
- Configuration for securing the private URL with form login
Let's start by creating a SecurityConfig class within a config package, and annotating it with @EnableWebSecurity and @Configuration. We will define beans of type SecurityFilterChain for each scenario.
@Configuration
@EnableWebSecurity
public class SecurityConfig {
}
API Security Filter Chain
Create an apiSecurityFilterChain bean that also takes in an HttpSecurity object. This time, the configuration should ensure that any request for /api/** requires authentication, with HTTP basic authentication and session management disabled.
Remember to add another @Order annotation here, for example @Order(1).
@Bean
@Order(1)
SecurityFilterChain apiSecurityFilterChain(HttpSecurity http) throws Exception {
return http
.securityMatcher("/api/**")
.authorizeHttpRequests(auth -> {
auth.anyRequest().authenticated();
})
.sessionManagement(session -> session.sessionCreationPolicy(SessionCreationPolicy.STATELESS))
.httpBasic(withDefaults())
.build();
}
H2 Console Security Filter Chain
Create a h2ConsoleSecurityFilterChain bean that takes in an HttpSecurity object. Ensure that any request for /h2-console/** is permitted, CSRF protection is ignored for H2 console, and frame options are disabled.
You'll also need to add an @Order annotation here to ensure that this security configuration is processed in the correct order. For example, add @Order(2) as an annotation on your h2ConsoleSecurityFilterChain method.
@Bean
@Order(2)
SecurityFilterChain h2ConsoleSecurityFilterChain(HttpSecurity http) throws Exception {
return http
.securityMatcher(AntPathRequestMatcher.antMatcher("/h2-console/**"))
.authorizeHttpRequests( auth -> {
auth.requestMatchers(AntPathRequestMatcher.antMatcher("/h2-console/**")).permitAll();
})
.csrf(csrf -> csrf.ignoringRequestMatchers(AntPathRequestMatcher.antMatcher("/h2-console/**")))
.headers(headers -> headers.frameOptions().disable())
.build();
}
Form Login Security Filter Chain
Finally, create a formLoginSecurityFilterChain bean that takes in an HttpSecurity object. In this configuration, permit access to the root URL ("/") without authentication, and authenticate any other request with form login.
Add the @Order(3) annotation to ensure that this security configuration is processed last.
@Bean
@Order(3)
SecurityFilterChain securityFilterChain(HttpSecurity http) throws Exception {
return http
.authorizeHttpRequests(auth -> {
auth.requestMatchers("/").permitAll();
auth.requestMatchers("/error").permitAll();
auth.anyRequest().authenticated();
}
)
.formLogin(withDefaults())
.build();
}
Adding Security Matchers
To ensure that each security filter chain is only invoked for the matching pattern, add an @SecurityMatcher annotation to each bean:
- For the H2 Console filter chain, use an Ant matcher:
@SecurityMatcher(AntPathRequestMatcher("/h2-console/**")) - For the API filter chain, use an MVC matcher:
@SecurityMatcher(MvcRequestMatcher("/api/**")) - For the Form Login filter chain, you can omit the
@SecurityMatcheras it will only be invoked if none of the other matchers apply.
Now, run the application again and test each scenario:
- Access the H2 console without authentication:
http://localhost:8080/h2-console - Call the
/api/postsendpoint and authenticate using HTTP Basic - Access the
/privateURL and authenticate using Form login
You should find that each security configuration works as expected.
Conclusion
In this tutorial, we covered how to create multiple Spring Security configurations for different authorization scenarios. This approach can help keep your security configurations clean and focused, making them easier to understand and maintain. By leveraging Spring Security's @Order, @SecurityMatcher, and other features, you can easily build complex and secure applications.
Happy coding!
Related Articles
Spring Security 7 Multi-Factor Authentication: Complete Tutorial with @EnableMultiFactorAuthentication
Learn how to implement multi-factor authentication (MFA) in Spring Boot 4 using Spring Security 7's new @EnableMultiFactorAuthentication annotation. Step-by-step tutorial with one-time token login and custom PIN codes.
RestClient OAuth2 Support in Spring Security 6.4: A Complete Guide
Learn how to implement OAuth2 authentication in your Spring applications using the new RestClient OAuth2 support in Spring Security 6.4. This guide covers architecture, implementation, and best practices for secure service-to-service communication.
Building a Spring Security Login Form with JTE
Learn how to create a secure login form using Spring Security and JTE (Java Template Engine) with support for both traditional authentication and OAuth2 providers.