In this article, we'll discuss a recent tweet I sent out regarding the Domain Class Converter in Spring Data. The Domain Class Converter can convert any arbitrary input into a domain class managed by a Spring Data Repository (specifically a Crud Repository). We'll go through a tutorial that demonstrates how to use this feature.
If you're not already following me on Twitter, be sure to do so! I'm on Twitter as TheRealDanVega, where I share tips, discussions, and tutorials about Spring and programming in general.
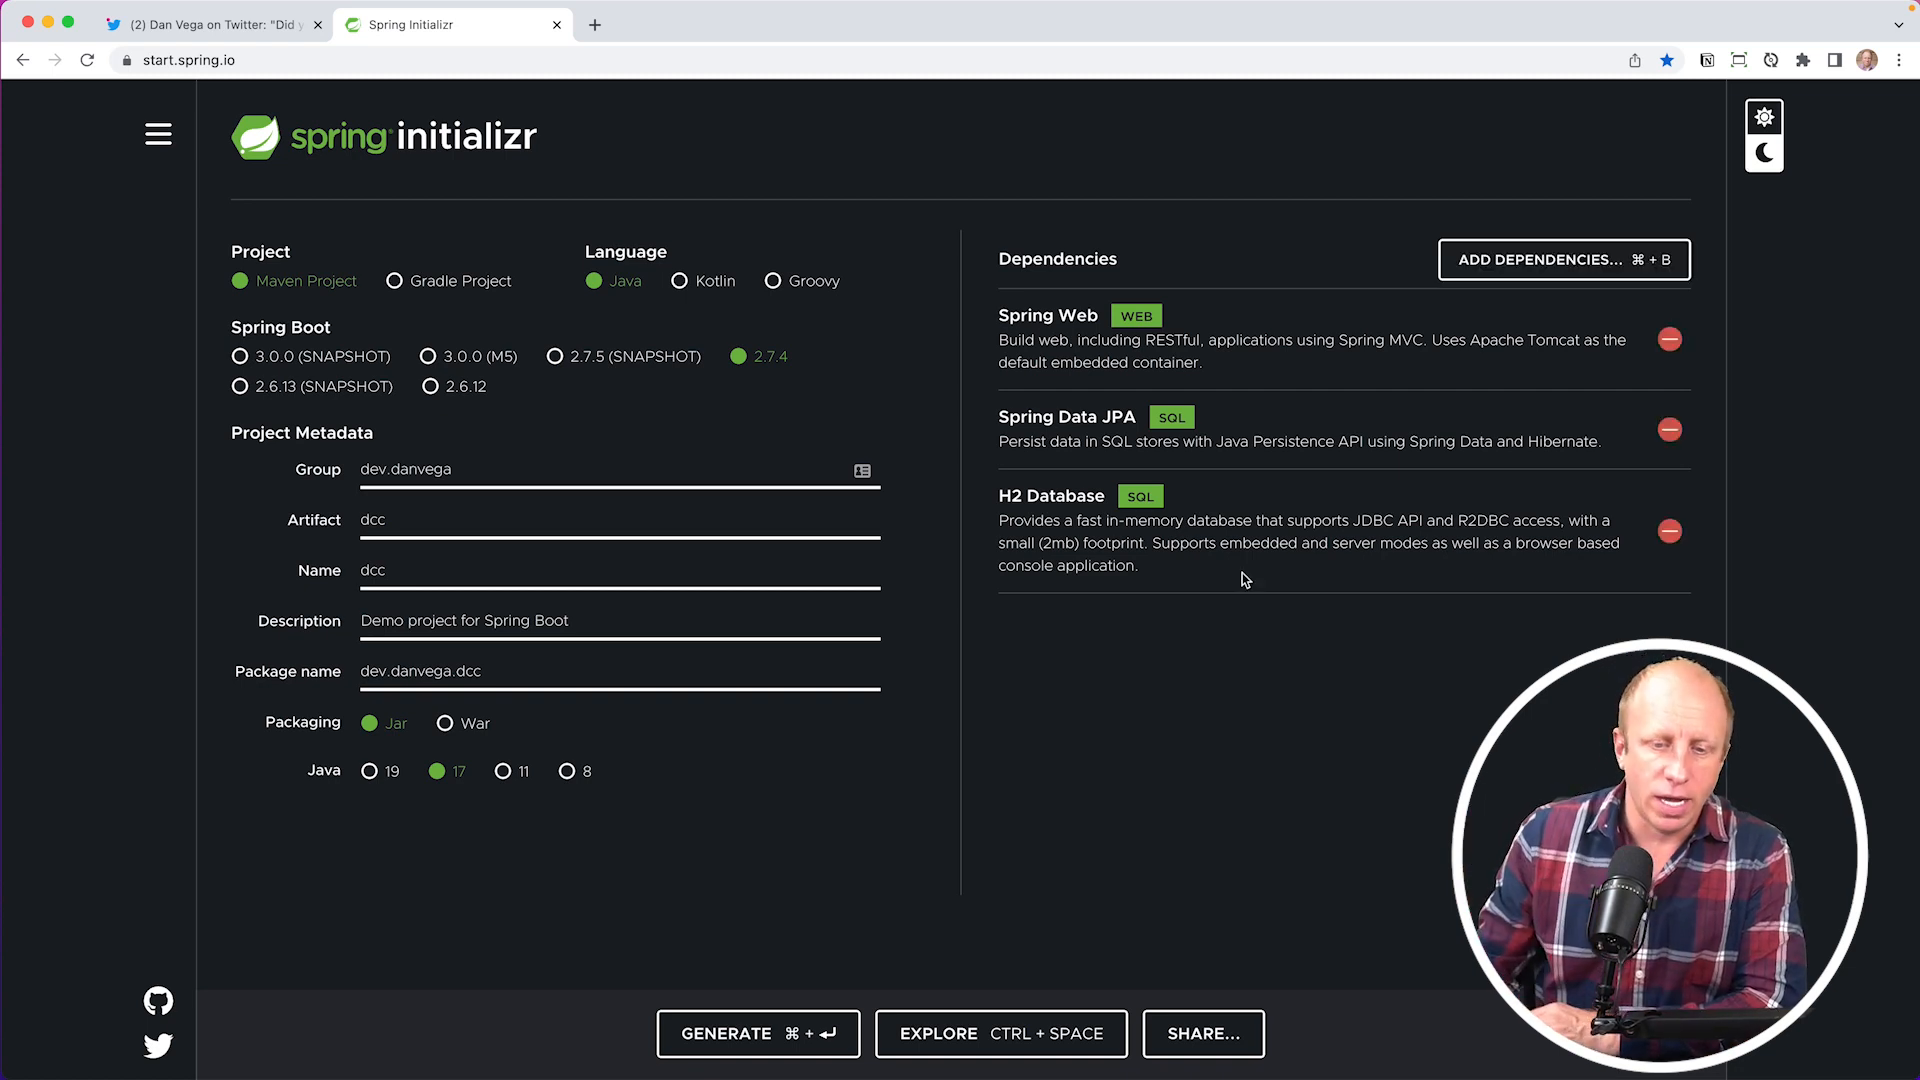
Getting Started
We'll begin by bootstrapping a simple Spring application that uses Spring Data JPA. Head over to https://start.spring.io/ and create a new project with the following settings:
- Group ID:
dev.danvega - Artifact ID:
dcc(for Domain Class Converter) - Java:
version 17 - Dependencies:
web,data-jpa,h2
 Once your project is generated, you can open it in your favorite IDE (I'll be using IntelliJ in this tutorial).
Creating the Model, Repository, and Controller
Our application will revolve around blog posts. We'll create a simple Post entity with fields such as id, title, content, publishedOn, and updatedOn. To get started, create a model package in your project and add a new class called Post. Annotate this class with @Entity, and then create the necessary fields and methods, such as a no-argument constructor, getters, and setters.
@Entity
public class Post {
@Id
private Integer id;
private String title;
private String content;
private LocalDateTime publishedOn;
private LocalDateTime updatedOn;
public Post() {}
public Post(Integer id, String title, String content) {
this.id = id;
this.title = title;
this.content = content;
this.publishedOn = LocalDateTime.now();
this.updatedOn = LocalDateTime.now();;
}
// getters, setters & toString omitted
}
Next, create a repository package and add a new interface called PostRepository. This interface should extend the CrudRepository and take Post and Integer as its type arguments. By extending CrudRepository, we get basic CRUD functionality out of the box, such as findById(), findAll(), and save().
package dev.danvega.dcc.repository;
import dev.danvega.dcc.model.Post;
import org.springframework.data.repository.CrudRepository;
public interface PostRepository extends CrudRepository<Post,Integer> {
}
Finally, create a controller package and add a new class called PostController. Annotate this class with @RestController and add a @RequestMapping with the path set to /api/posts. Inject an instance of PostRepository using constructor injection, then create findAll() and findById() methods that leverage the repository's methods to return posts.
@RestController
@RequestMapping("/api/posts")
public class PostController {
private final PostRepository posts;
public PostController(PostRepository posts) {
this.posts = posts;
}
@GetMapping
public Iterable<Post> findAll() {
return posts.findAll();
}
@GetMapping("/{id}")
public Post findById(@PathVariable Integer id) {
return posts.findById(id);
}
}
Configuring the Application Properties
We need to configure our application to work with the H2 in-memory database. Open your application.properties file and add the following properties:
spring.h2.console.enabled=true
spring.h2.console.name=jpablog
spring.datasource.url=jdbc:h2:mem:japablog
spring.datasource.username=sa
spring.datasource.password=
spring.jpa.show-sql=true
These properties enable the H2 console, set its name to jpablog, configure the data source URL, and enable the display of generated SQL.
Seeding the Database
To test our application, we need some initial data in our database. We can achieve this by creating a CommandLineRunner bean. This functional interface allows us to execute some code after the application context has been created and before the application runs.
In our CommandLineRunner bean, we'll inject an instance of PostRepository and use its save() method to create and save some sample Post objects to the database.
@Bean
public CommandLineRunner seedData(PostRepository posts) {
return args -> {
posts.save(new Post(1, "Hello World", "Welcome to my blog"));
posts.save(new Post(2, "Hello JPA", "Working with Spring Data JPA"));
};
}
Using the Domain Class Converter
With our application setup and initial data in place, we can now explore the main topic of this tutorial: the Domain Class Converter.
In our PostController, we have a findById() method that takes an id path variable and returns the corresponding post. We can simplify this method by leveraging the Domain Class Converter.
Instead of using an Integer parameter for the id, we can use a Post parameter directly, and annotate it with @PathVariable("id"). This tells Spring to use the Domain Class Converter to look up the Post by its id and assign it to the parameter.
@GetMapping("/{id}")
public Post findById(@PathVariable("id") Post post) {
return post;
}
Now our findById() method is simplified, and we no longer need to call the repository's findById() method explicitly in our controller.
Testing the Application
Start the application and navigate to the H2 console at http://localhost:8080/h2-console. Connect to the database using the data source name (jpablog) and view the contents of the POST table. You should see the two sample posts we added earlier.
Now, test the findAll() and findById() endpoints in your browser:
- http://localhost:8080/api/posts should return a list of all posts.
- http://localhost:8080/api/posts/1 should return the post with ID 1.
- http://localhost:8080/api/posts/2 should return the post with ID 2.
Conclusion
The Domain Class Converter is a useful feature that can simplify your Spring Data application by converting arbitrary input, like an ID, into a domain class managed by a Crud Repository. Though it may seem like a small change, it can make your code cleaner and more concise.
I hope you found this tutorial helpful! If you did, please give it a thumbs up, and don't forget to follow me on Twitter for more tips, tutorials, and discussions about Spring Boot, Java, and programming in general. Happy coding!
Related Articles
Spring Data AOT Repositories: Faster Startup and Build-Time Query Validation
Learn how Spring Data AOT Repositories move query processing from runtime to compile time, reducing startup times and memory usage, plus how to validate repository methods at build time.
Query By Example in Spring Data JPA: A Clean Approach to Dynamic Queries
Learn how to simplify your Spring Data JPA queries using Query By Example (QBE) and create dynamic, type-safe queries without the boilerplate code.
GraphQL for Java Developers
Learn how to build scalable GraphQL APIs with Java 26 and Spring Boot 4. This course walks you through schema-first development, batch loading, unions, Query by Example, AOT repositories, and more.