In this blog post, we'll be taking a look at mutations in GraphQL, specifically using Spring Boot, GraphQL Java, and Spring Data JPA. Up until now, we've mostly been focused on getting started with GraphQL and simple operations like queries. However, there's a lot more to GraphQL, like mutations, subscriptions, and new features in recent releases. Let's dive in and create a new project to explore these concepts!
Create a Spring Boot Project with GraphQL
To get started, we'll need a new Java Maven project. Using Spring Initializr, create a project with the following configuration:
- Project type: Maven
- Packaging: Jar
- Java: 17
- Dependencies: Web, Spring Data JPA, H2, and Spring Boot GraphQL
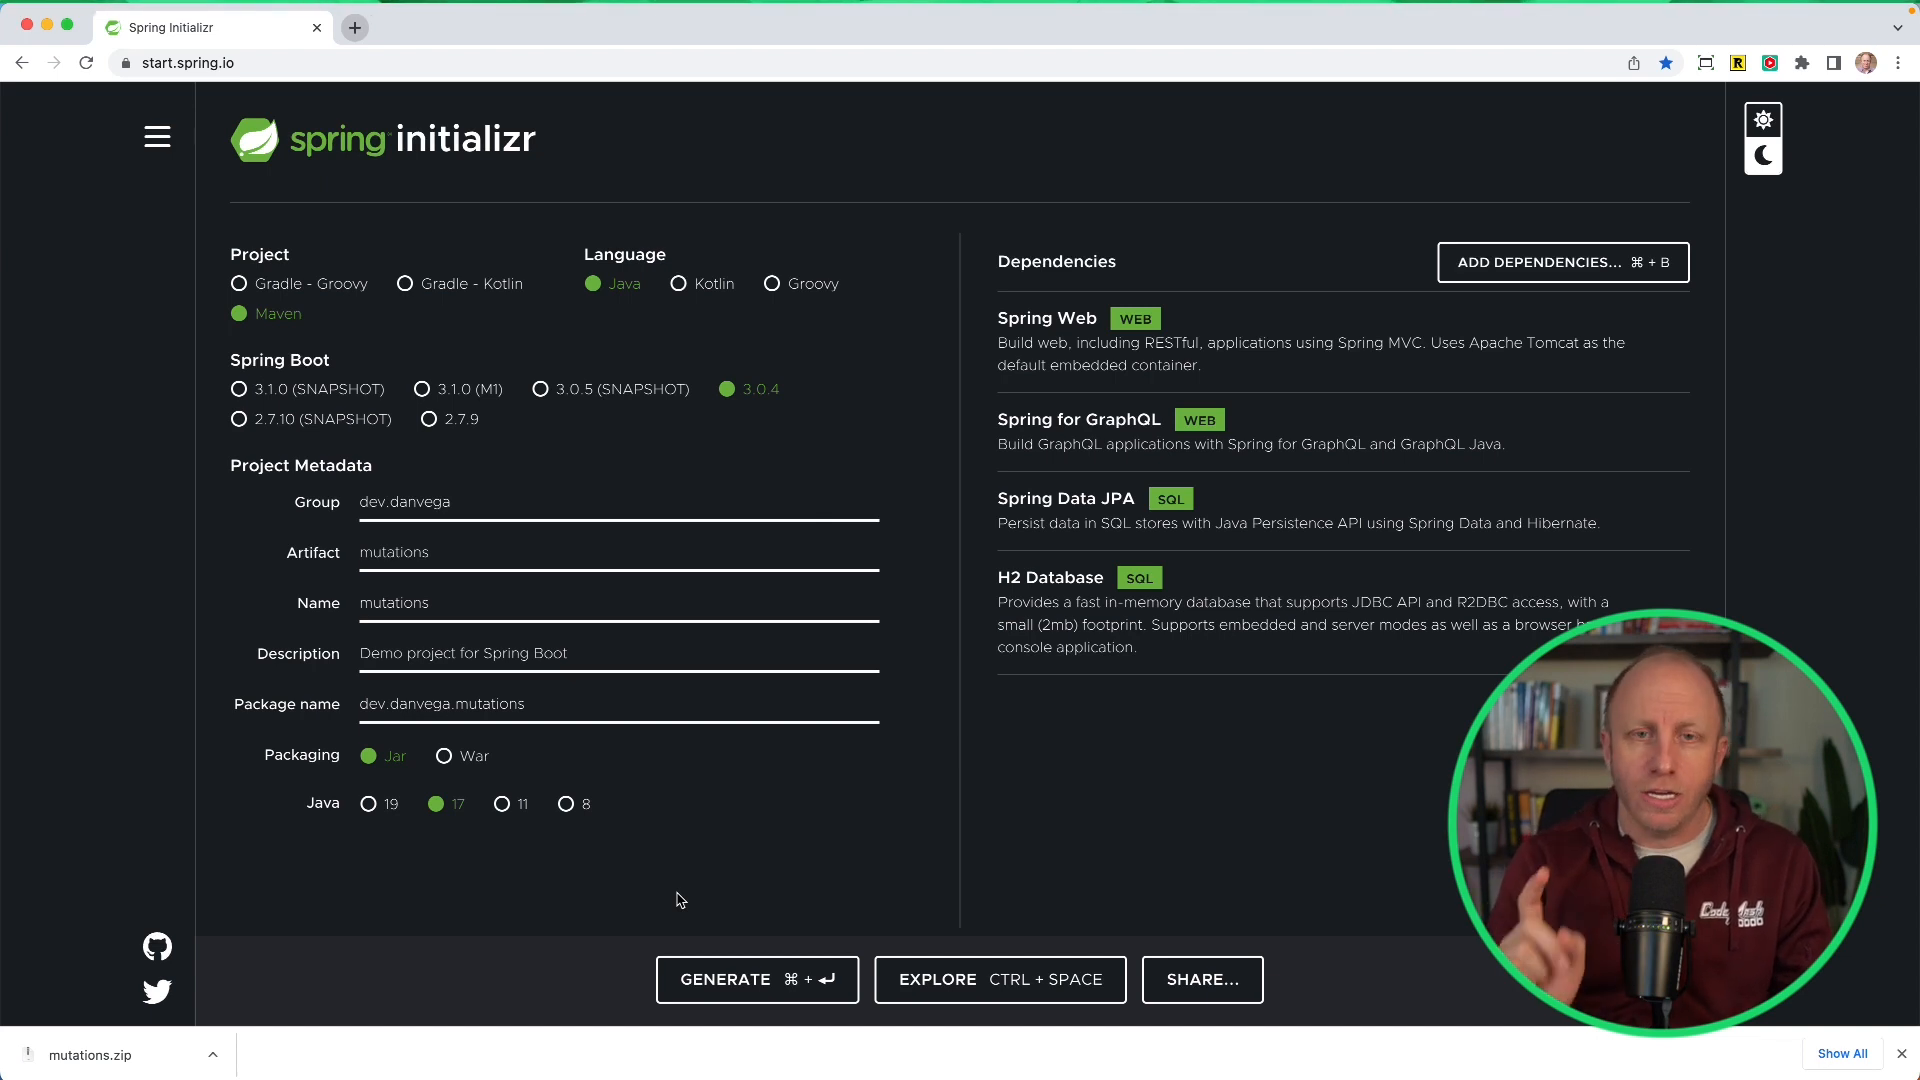 Download the generated project and open it in your favorite IDE. We're going to create a simple application that simulates a library system with books and reviews.
Set Up Entities and Repositories
First, let's create some model classes for our application. We'll use Spring Data JPA to define Book and Review entities, along with a BookRepository interface for database operations:
- Create a
Bookclass in themodelpackage and annotate it with@Entity. Add fields forid,title,pages,author, andreviews. Use appropriate JPA annotations, such as@Idand@GeneratedValuefor theidfield.
@Entity
public class Book {
@Id
@GeneratedValue
private Integer id;
private String title;
private Integer pages;
private String author;
@OneToMany(cascade = CascadeType.ALL)
@JoinColumn(name = "book_id")
private List<Review> reviews;
// Constructors, getters, and setters
}
- Create a
Reviewclass in themodelpackage and annotate it with@Entity. Add fields forid,title, andcomment.
@Entity
public class Review {
@Id
@GeneratedValue
private Integer id;
private String title;
private String comment;
// Constructors, getters, and setters
}
- Create a
BookRepositoryinterface in therepositorypackage, extendingJpaRepositoryand specifyingBookas the entity type andIntegeras the ID type:
public interface BookRepository extends JpaRepository<Book, Integer> {}
Configure Application Properties and Sample Data
Next, let's configure our application properties to specify some settings for the H2 database connection, enable the H2 console, and show SQL statements.
Add the following properties to the application.properties file:
spring.datasource.name=books
spring.datasource.generate-unique-name=false
spring.h2.console.enabled=true
spring.jpa.show-sql=true
spring.graphql.servlet.enabled=true
We'll also need some sample data for our application. In the Application.java class, create a CommandLineRunner bean that initializes a Book and a Review and saves them to the database using the BookRepository.
@Bean
public CommandLineRunner initData(BookRepository bookRepository) {
return args -> {
Book book = new Book("Reactive Spring", 484, "Josh Long");
Review review = new Review("Great book!", "I really enjoyed this book!");
book.setReviews(Collections.singletonList(review));
bookRepository.save(book);
};
}
This is a great opportunity to tell you that you should pick up Josh Long's book, Reactive Spring. It's a great read!

At this point, you should be able to run your application, and you'll see that the book and review are saved to the database.
Create a GraphQL Query
Now that we have our basic data model set up, let's create a simple GraphQL query to fetch our books. In the resources folder, create a graphql directory and a file called schema.graphqls. In this file, define a Book type, a Review type, and a Query type.
type Book {
id: ID
title: String
pages: Int
author: String
reviews: [Review]
}
type Review {
id: ID
title: String
comment: String
}
type Query {
findAllBooks: [Book]
}
In your application create a REST controller named BookController with a method that returns all books from the BookRepository. Use the @QueryMapping annotation to link the method to the findAllBooks query in your GraphQL schema.
@RestController
@RequestMapping("/api/books")
public class BookController {
private final BookRepository bookRepository;
public BookController(BookRepository bookRepository) {
this.bookRepository = bookRepository;
}
@QueryMapping
public List<Book> findAllBooks() {
return bookRepository.findAll();
}
}
At this point, you should be able to run your application and use the GraphiQL Playground to test your findAllBooks query.
query {
findAllBooks {
id
title
pages
author
reviews {
id
title
comment
}
}
}
Working with GraphQL Mutations
Now let's explore different ways we can work with mutations in our application. A mutation is essentially an operation that makes changes to our data, such as creating, updating, or deleting records.
Simple Mutation with Basic Types
First, let's create a simple mutation that takes in basic types like strings and integers as inputs. In your controller, create a new method called createBook that accepts three parameters (title, pages, and author), and returns a Book. Use the @MutationMapping and annotation to associate the method with a mutation field in your GraphQL schema. The @Argument annotation maps the GraphQL named arguments to your method parameters.
@MutationMapping
public Book createBook(@Argument String title, @Argument Integer pages, @Argument String author) {
Book book = new Book(title, pages, author);
return bookRepository.save(book);
}
Next, update your GraphQL schema to define the Mutation type with a createBook field:
type Mutation {
createBook(title: String, pages: Int, author: String): Book
}
With this setup, you can now use a tool like GraphiQL Playground to run a mutation that creates a new book.
mutation CreateBook {
createBook(title: "My new book", pages: 99, author: "Dan Vega") {
id
title
pages
author
}
}
Mutation with Object Input Type
In more complex scenarios, you might need to accept an entire object as input for a mutation. To do this, create a new BookInput record in your model package, which essentially mirrors the properties of your Book entity:
public record BookInput(String title, Integer pages, String author) {}
Define an input type in your GraphQL schema that corresponds to your BookInput record:
input BookInput {
title: String
pages: Int
author: String
}
Create a new method called addBook in BookController that accepts a BookInput argument and returns a Book. As before, use the @MutationMapping and @Argument annotations:
@MutationMapping
public Book addBook(@Argument BookInput bookInput) {
Book book = new Book(bookInput.title(), bookInput.pages(), bookInput.author());
return bookRepository.save(book);
}
Update your GraphQL schema to add an addBook field to the Mutation type:
type Mutation {
createBook(title: String, pages: Int, author: String): Book
addBook(book: BookInput!): Book
}
Now you can run a mutation that creates a new book using an object input rather than individual strings and integers.
mutation AddBook {
addBook(book: { title: "My New Book", pages: 199, author: "Dan Vega" }) {
id
title
pages
author
}
}
Mutation with List Input Type
Finally, let's create a mutation that accepts a list of objects as input. Add a new method called batchCreate in your BookController that takes a list of BookInput objects and maps each input object to a Book entity, and saves the books in the database.
@MutationMapping
public List<Book> batchCreate(@Argument List<BookInput> books) {
return books.stream()
.map(bookInput -> new Book(bookInput.title(), bookInput.pages(), bookInput.author()))
.map(bookRepository::save)
.collect(Collectors.toList());
}
Update your GraphQL schema to add a batchCreate field to the Mutation type, specifying that the input list should not be empty:
type Mutation {
createBook(title: String, pages: Int, author: String): Book
addBook(book: BookInput!): Book
batchCreate(books: [BookInput!]!): [Book]
}
Now you can run a mutation that creates multiple books in a single operation by passing in a list of book inputs.
mutation BatchCreate {
batchCreate(
books: [
{ title: "Batch Book 1", pages: 99, author: "New Author" }
{ title: "Batch Book 2", pages: 99, author: "New Author" }
{ title: "Batch Book 3", pages: 99, author: "New Author" }
{ title: "Batch Book 4", pages: 99, author: "New Author" }
{ title: "Batch Book 5", pages: 99, author: "New Author" }
]
) {
id
title
pages
author
}
}
Conclusion
In this blog post, we explored how to work with mutations in GraphQL, specifically using Spring Boot, GraphQL Java, and Spring Data JPA. We covered different ways of passing input to our mutations, including simple types, object input types, and list input types. With this knowledge in hand, you can create powerful GraphQL APIs that allow clients to make complex updates to your data models. Happy coding!
Related Articles
GraphQL for Java Developers
Learn how to build scalable GraphQL APIs with Java 26 and Spring Boot 4. This course walks you through schema-first development, batch loading, unions, Query by Example, AOT repositories, and more.
Evolving your API without Versioning in GraphQL
Explore modern approaches to API versioning in GraphQL, including schema evolution strategies, deprecation patterns, and best practices for maintaining backward compatibility while evolving your API.
Building Dynamic GraphQL APIs with Spring Boot and Query by Example
Learn how to build flexible and maintainable GraphQL APIs using Spring Boot's Query by Example support, reducing boilerplate code while enabling powerful search capabilities.