In this article we're talking all about Spring Boot 3.1 RC1, which has just been released with many great features. In particular, we're going to focus on the ability to use Docker Compose files directly with Spring Boot applications.
This isn't a new feature per se, but it comes with some significant improvements over previous versions. One of the major enhancements is that the Spring Boot Docker Compose Module will start and stop your containers automatically. Additionally, you no longer need to duplicate properties between your Docker Compose file and application.properties.
In this blog post, I'll show you how to get started with this exciting new feature in Spring Boot 3.1 RC1. Let's begin with a demo!
Setting up a Spring Boot 3.1 Project
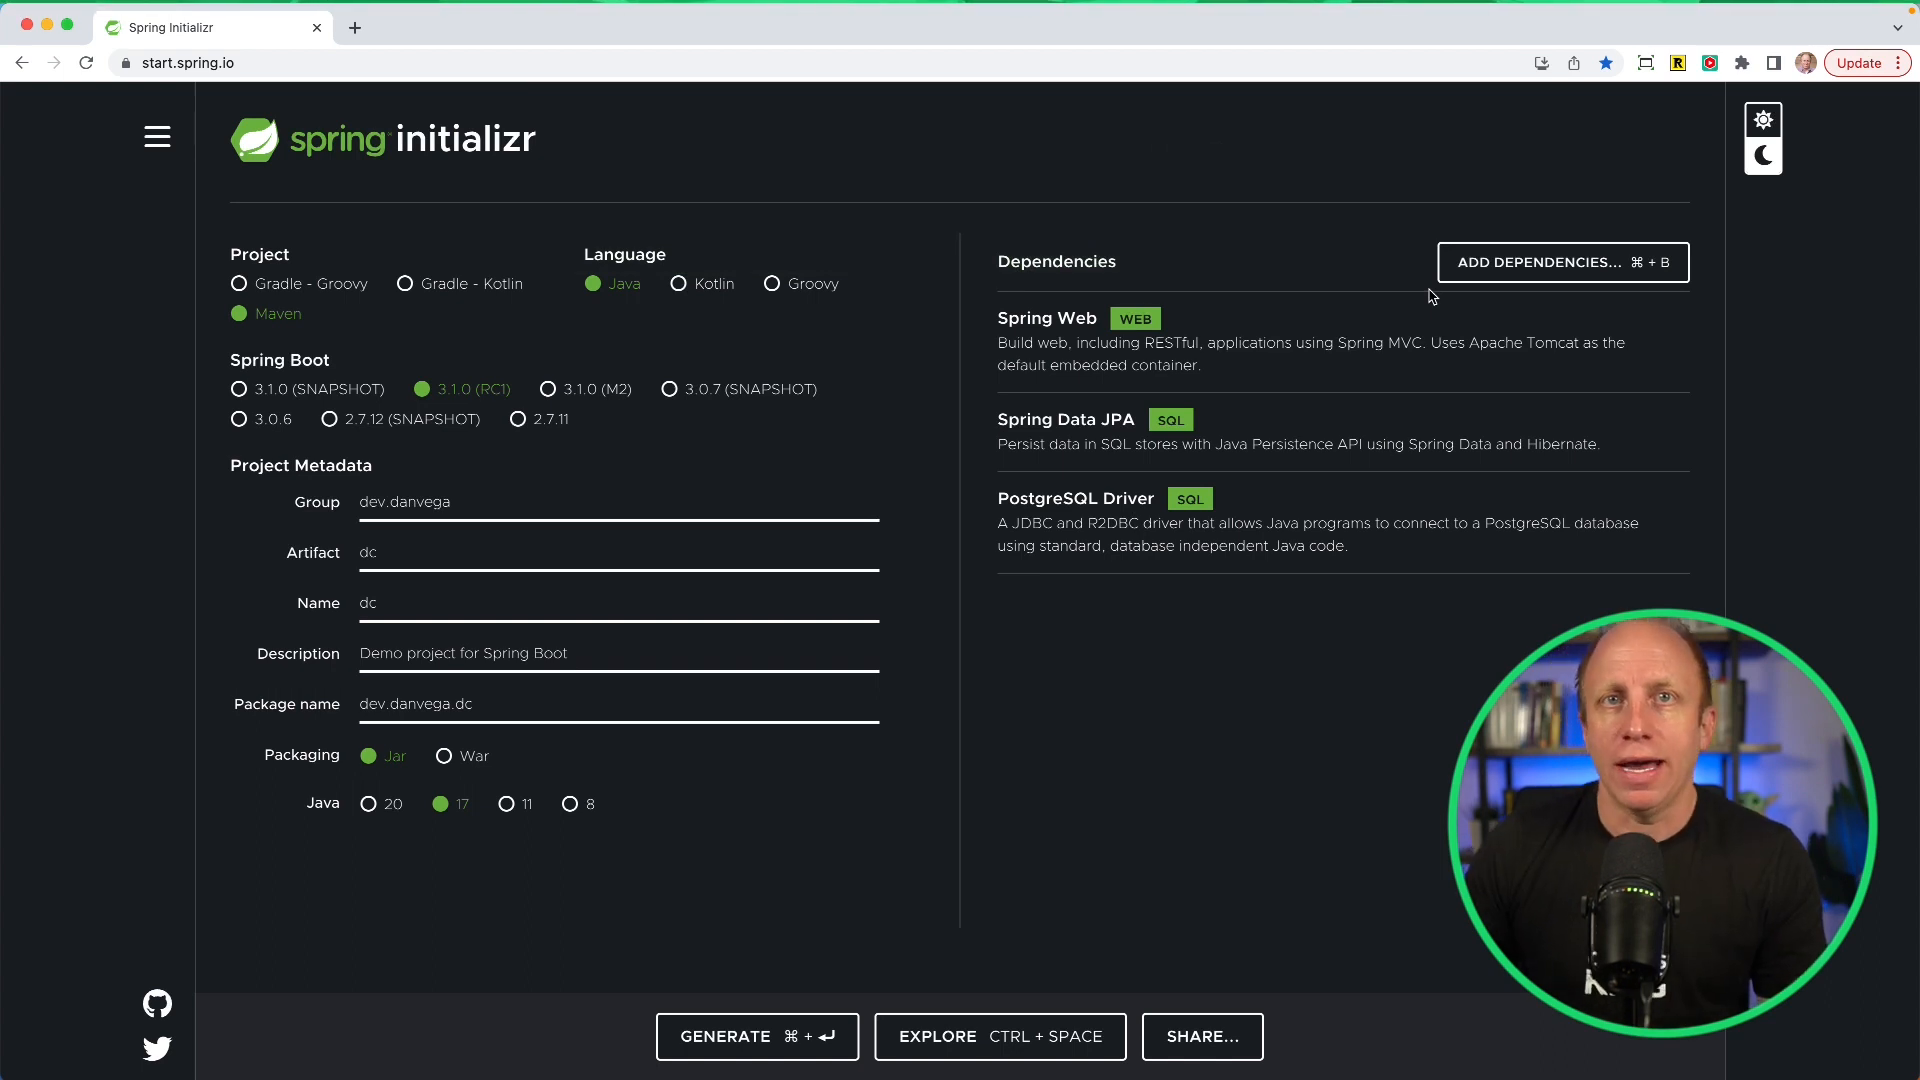
First, let's set up a basic Spring Boot 3.1 project using Spring Initializr. Here's a quick overview of the options we're going to select:
- Maven Project
- 3.1.0 RC1 version
- Java 17
- Dependencies: Web, Spring Data JPA, PostgreSQL Driver

With these options selected, click "Generate" and extract the downloaded zip file. Open the extracted project in your favorite IDE or editor (I'm using IntelliJ IDEA Ultimate Edition).
Creating a Simple Blog Application
For this demo, let's create a simple blog application with a single Post entity and a RESTful API to fetch all posts.
Start by creating a Java class called Post in the model package:
@Entity
public class Post {

    @Id
    @GeneratedValue
    private Integer id;

    private String title;

    private String body;

    // Constructors, getters, setters, and toString() methods go here
}
Next, create a new interface called PostRepository in the repository package that extends CrudRepository<Post, Integer>:
public interface PostRepository extends CrudRepository<Post, Integer> {

}
Now, let's create a PostController class in the controller package with a single GET endpoint to fetch all posts:
@RestController
@RequestMapping("/api/posts")
public class PostController {

    private final PostRepository repository;

    public PostController(PostRepository repository) {
        this.repository = repository;
    }

    @GetMapping
    public List<Post> findAll() {
        return (List<Post>) repository.findAll();
    }
}
Adding Docker Compose
At this point, we've got a basic application with a single REST endpoint to fetch all posts. Now, let's add Docker Compose for spinning up a PostgreSQL container as our database.
Create a new file called docker-compose.yml in the project's root directory:
version: "3.1"

services:
  db:
    image: postgres
    restart: always
    ports:
      - "5432:5432"
    environment:
      POSTGRES_USER: postgres
      POSTGRES_PASSWORD: password
      POSTGRES_DB: blog
Now that we have a Docker Compose file in place, we need to make a couple of changes to enable auto-start/stop of containers and avoid duplicating properties.
First, add the spring-boot-starter-docker-compose dependency in your pom.xml:
<dependency>
    <groupId>org.springframework.boot</groupId>
    <artifactId>spring-boot-starter-docker-compose</artifactId>
    <version>3.1.0-RC1</version>
</dependency>
Then, in your application.properties file, add the following line to enable auto-generation of DDL statements for JPA:
spring.jpa.hibernate.ddl-auto=create
Now, you're ready to run your application! When you start the Spring Boot application, it will automatically create the PostgreSQL container and set up the connection using the properties defined in the docker-compose.yml file. Additionally, no duplicated properties are required, making this a much cleaner solution.
Conclusion
In this blog post, we've taken a look at one of the exciting new features in Spring Boot 3.1 RC1 – simplified Docker Compose usage. This new feature allows developers to auto-start/stop containers and avoid duplicating properties, which makes for a better overall development experience.
If you found value in this tutorial, please consider subscribing to my newsletter for more content like this. As always…
Happy Coding!