In this tutorial, we will discuss how to set up OAuth 2 logins in Spring Security with Spring Boot. OAuth 2 logins are a convenient way to let your users log in via social media (GitHub, Google, Twitter) without needing to register on your system.
Prerequisites
You should be familiar with Java, Spring Boot, and Spring Security. Optionally, you should know how to use IntelliJ IDEA, but you can use any IDE of your choice.
Setting up the Project
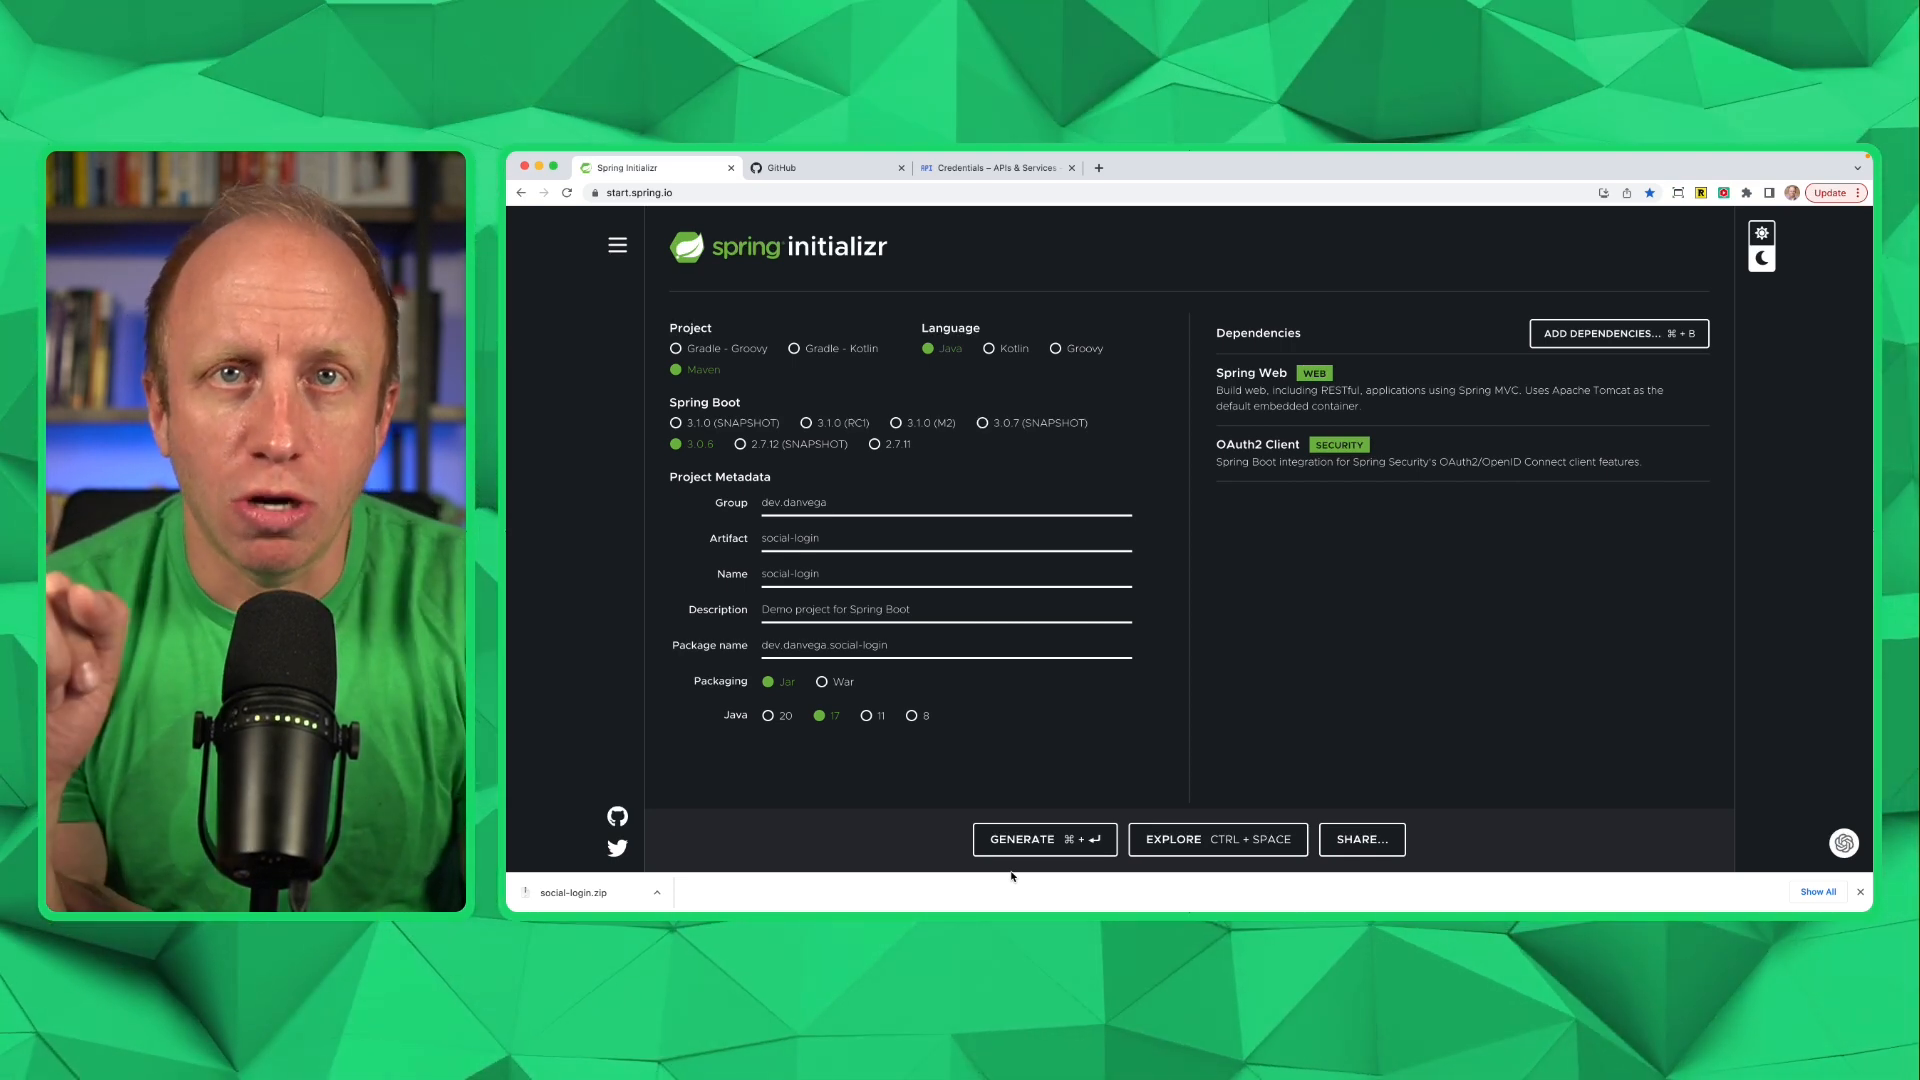
- Visit start.spring.io to create a new Spring Boot project.
- Select Maven as your build tool and Java as your language.
- Change the group to something meaningful. For example,
dev.danvega. - Name your project, like
SocialLogin. - Choose JDK 17 (or the latest available).
- Add dependencies:
webandoauth2-client. Spring Security will be added as a transitive dependency. - Generate and download the project. This will provide a zip file.
Unzip the project and open it in your favorite IDE or text editor. I'll use IntelliJ IDEA Ultimate.
Creating a Controller
Start by creating a HomeController class, where we'll set up both public and private routes.
@RestController
public class HomeController {

    @GetMapping("/")
    public String home() {
        return "Hello, home!";
    }

    @GetMapping("/secured")
    public String secured() {
        return "Hello, secured!";
    }
}
With these routes in place, we can now set up our security configuration.
Configuring Spring Security
First, create a new SecurityConfig class in the config package:
@Configuration
@EnableWebSecurity
public class SecurityConfig {

    @Bean
    SecurityFilterChain securityFilterChain(HttpSecurity http) throws Exception {
        return http
                .authorizeHttpRequests(auth -> {
                    auth.requestMatchers("/").permitAll();
                    auth.requestMatchers("/favicon.ico").permitAll();
                    auth.anyRequest().authenticated();
                })
                .oauth2Login(withDefaults())
                .formLogin(withDefaults())
                .build();
    }

}
Here, we configured Spring Security to allow anyone to access the / route, but require authentication for any other route. We've enabled both form login and OAuth2 login as authentication methods.
Setting up OAuth2 Providers
To set up OAuth2 providers, add the following properties to your application.properties file.
# Logging level
logging.level.org.springframework.security=TRACE

# GitHub
spring.security.oauth2.client.registration.github.client-id=<your-github-client-id>
spring.security.oauth2.client.registration.github.client-secret=<your-github-client-secret>

# Google
spring.security.oauth2.client.registration.google.client-id=<your-google-client-id>
spring.security.oauth2.client.registration.google.client-secret=<your-google-client-secret>
Note: You'll need to replace <your-github-client-id>, <your-github-client-secret>, <your-google-client-id>, and <your-google-client-secret> with the corresponding values from your OAuth providers.
Setting up GitHub as an OAuth Provider
- Go to your GitHub account settings, and navigate to Developer settings > OAuth Apps.
- Click "New OAuth App" and fill in the required fields.
- For the "Authorization callback URL," use:
http://localhost:8080/login/oauth2/code/github. - Register the application, and you'll receive a
client_idandclient_secretfor your properties file.
Setting up Google as an OAuth Provider
- Visit the Google Cloud Console at console.cloud.google.com.
- Set up the OAuth 2 consent screen if you haven't done so already.
- Go to the Credentials section and create a new OAuth 2 client ID.
- Select "Web application" as the type, and enter a name for the application.
- Add an authorized redirect URI:
http://localhost:8080/login/oauth2/code/google. - Click "Create" to obtain your
client_idandclient_secretfor your properties file.
Testing the Application
Run your Spring Boot application and visit http://localhost:8080/ in your browser. You should see the public "Hello, home!" message.
Now, navigate to http://localhost:8080/secured, and you will be prompted to log in via form login or the OAuth providers you configured (GitHub and Google). Log in using one of those providers, and you will be redirected to the secured "Hello, secured!" page.
Conclusion
In this blog post, we demonstrated how easy it is to set up OAuth 2 logins in Spring Security with Spring Boot, allowing your users to authenticate via social media platforms like GitHub and Google without having to register on your system.
If you're interested in customizing the login page or want further information about configuring OAuth2 properties, you can refer to the Spring Security documentation.
Related Articles
Spring Security 7 Multi-Factor Authentication: Complete Tutorial with @EnableMultiFactorAuthentication
Learn how to implement multi-factor authentication (MFA) in Spring Boot 4 using Spring Security 7's new @EnableMultiFactorAuthentication annotation. Step-by-step tutorial with one-time token login and custom PIN codes.
RestClient OAuth2 Support in Spring Security 6.4: A Complete Guide
Learn how to implement OAuth2 authentication in your Spring applications using the new RestClient OAuth2 support in Spring Security 6.4. This guide covers architecture, implementation, and best practices for secure service-to-service communication.
Building a Spring Security Login Form with JTE
Learn how to create a secure login form using Spring Security and JTE (Java Template Engine) with support for both traditional authentication and OAuth2 providers.
subscribe.sh
$ subscribe --list weeklyish
Enjoyed this post? Get the next one.
Java, Spring, and what I'm learning — one email, weekly(ish). Unsubscribe anytime.